Thursday, 6 June 2013

Missing Bus controller driver

On this is as you can see on device manager there isn't a bus controller driver so it won't work unitl you get one.
 
 So I used a program called Aida 64 to find out what the bus driver was called then found the driver on the internet and installed it. You can install it two ways you can run the set up to the driver or click on the update drive button in device manager and direct it towards the installed driver.
As you can see this is the bus controller in device manager.

Wednesday, 8 May 2013

Remove Lines on the screen

 As you can see in the image to your left the image has lines across the screen, I've already tried to replace the panel but that didn't work so I replaced the cable connecting the motherboard to the screen......

 The is me replacing the lead from the screen........


Me replacing the lead from the motherboard........


Fitting the replaced wire where the old one went so all the casing goes back on without issue.


And on test it shows that the screen is now fully working without any lines across the screen.


Internet Stopping Issue

The issue with this is that internet explorer isn’t working this means that something with the internet explorer software is corrupt or damaged in some way. This can be solved.......
 
 First go onto the computers control panel and click on Internet Options.
 
 This is then the pop-up menu that appears. This is the settings for the internet. The next stage now is to click the advanced tab at the top.......


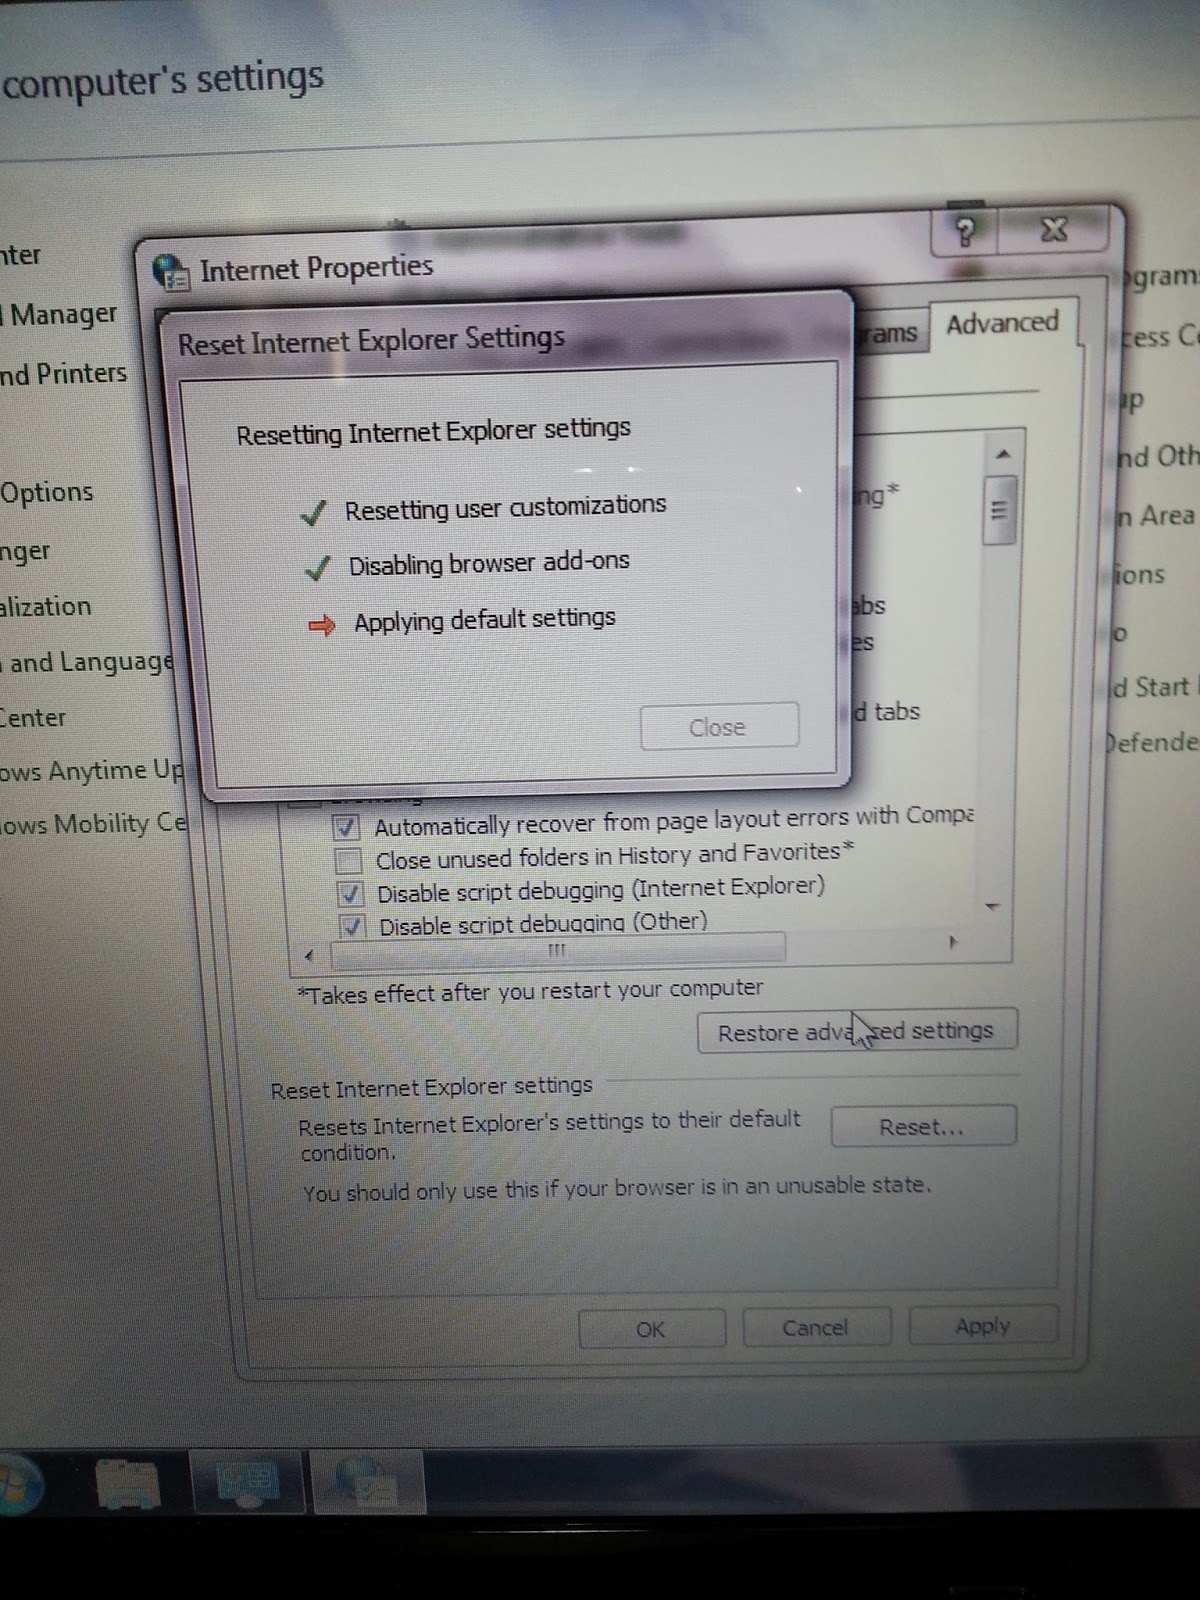
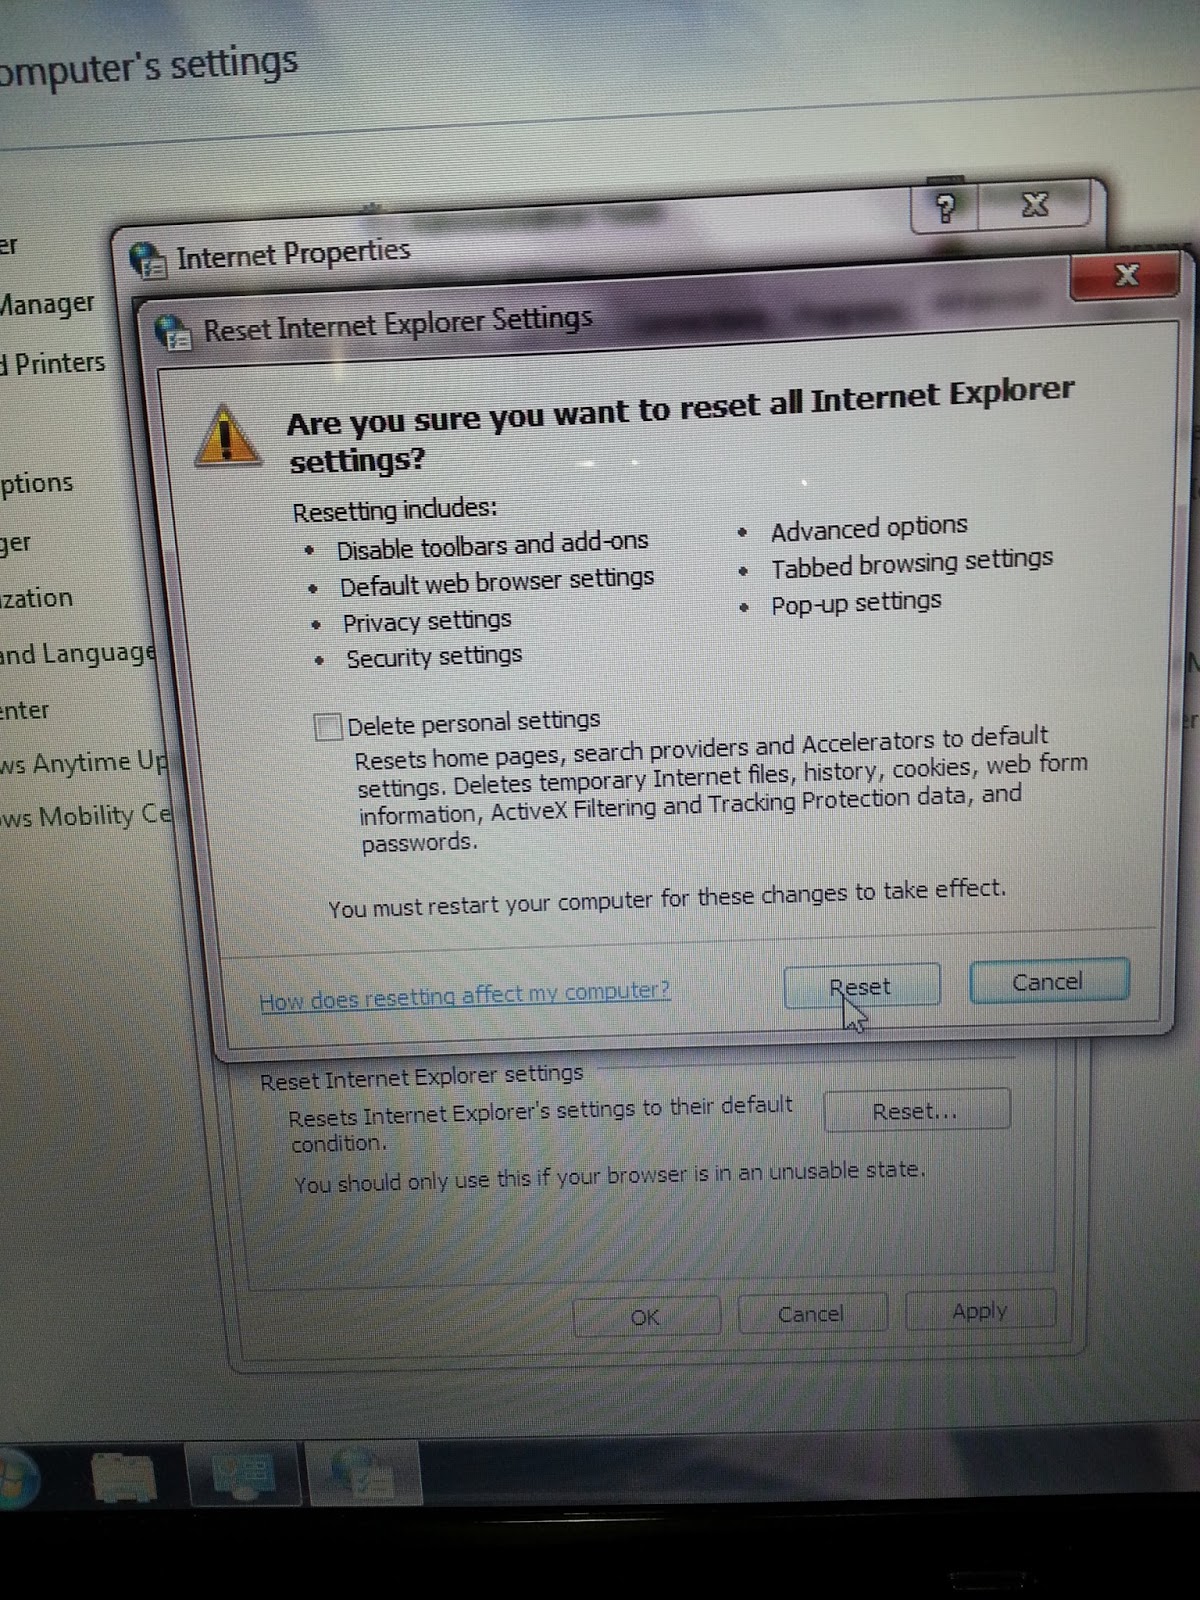
The pop-up on the left image will then appear this is asking whether you have any usernames/emails and passwords saved onto the internet that you want to get rid of. You don’t have to get rid of it. Once you have decided then you will click the next button and the other pop-up on the right image will appear this is the internet’s tick list to make sure its covered all aspects of restarting the software.

You will then find once you click back onto the internet again, it will load up and load everything without crashing or being corrupt anymore.


Keyboard Replacement

As you can see on this image the keyboard isn’t working. So it needs replacing...


First I unattached it from the casing, and then lift it up slowly due to it having a delicate cable on the keyboard. Then get lift the grip on the keyboard port. Then get your new keyboard and plug it in the same way


Then place the keyboard into the same position and screw the top screws down so it doesn’t pop up or come back out of place. And then run a test to see if it works ......


And as shown on this image the ‘1’ key is now fully working and so are all the other keys.
 

Tuesday, 7 May 2013

Ram/ Memory Replacement


This computer was running slow and then once restarting the system this image appeared on start-up. I then ran a memory test on it ....


Once running the memory test it showed a lot of errors with the memory. This meant that the laptop needed to have the ram in it replaced.


I then turned the laptop upside down and took the old ram out ....


And replaced it with the same sized ram but different stick as you can see.


Then I tested the new replacement Ram stick and turned the computer on. This shows that the computer turned on and that all my data was still on the laptop and no damage was done to any data.


Replacing a Failed wireless adapter

 
As you can see from the print screen that there is only the Ethernet port that is showing in device manager. This could be because the Wireless card has failed, the reason I know this is because if it was a driver issue then the wireless card would still show in the device manager, just under a different name.

To fix the issue I had to make sure that the laptop ha a network adapter in it so I had a look.


And I found that there was a network adapter in there. So I unplugged it from the board......


And replaced it with a brand new one (in the image you can see that there is the same orange sticker on the network adapter, this is because I took the sticker off the old one and placed it on a new one).


 And replaced it with a brand new one (in the image you can see that there is the same orange sticker on the network adapter, this is because I took the sticker off the old one and placed it on a new one).


 Once you have screwed one of the top corner screws into place then plug the White and Black wire in the wireless card the correct way around and test it.


As you can see in the image that the new network adapter is now showing in the device manager and is now fully working.


Thursday, 2 May 2013

Cmos Battery Replacement Time

When turning the Computer On this BIOS message appeared. The message states that there is an issue with CMOS Setting, for this to happen suddenly is strange the source of the problem would be the CMOS Battery; I looked internally inside the computer and found that there was a CMOS battery in there. So I thought to myself that CMOS batteries are only meant to last for at least 6 years but this model computer was a 2002 model nearly 11 years old so I replaced the CMOS battery. …..

 
Looking to check the battery is in …….


Replacing the CMOS battery……………


After replacing the CMOS battery I found that there was much less of a message than the previous one so I press F1 on the keyboard to go to the Setup.


On the Setup change the Date and time so they are both correct.


Once you have corrected the date and time press F10 to save changes. Once you have hit enter when the OK section is highlighted then the computer will reset.


 The computer now starts loading the operating system and will go back to normal again.


The start menu as it the same as when the error occurred, as you can see nothing was affected by the CMOS error.